Monday 3 December 2018

28mm ACW BP Game


Our first game in what seems like an age.  Think both Bob and I have the ‘wargaming blues’ where you fall out of love with the painting and the hobby generally, but we were determined to get over it.  Before I went on holiday to the US I had talked to him about a scenario involving an attack by Confederate forces on a Union encampment.  I even started to set it up on my table, printed lots of tents from my Whitewash City pdfs and then it just sat there half finished for a couple of months.

Anyway we decided it was high time we got to grips with it even if only so I could clear my table without feeling guilty.  It also seemed a very long time since we had had our Civil War figures out.

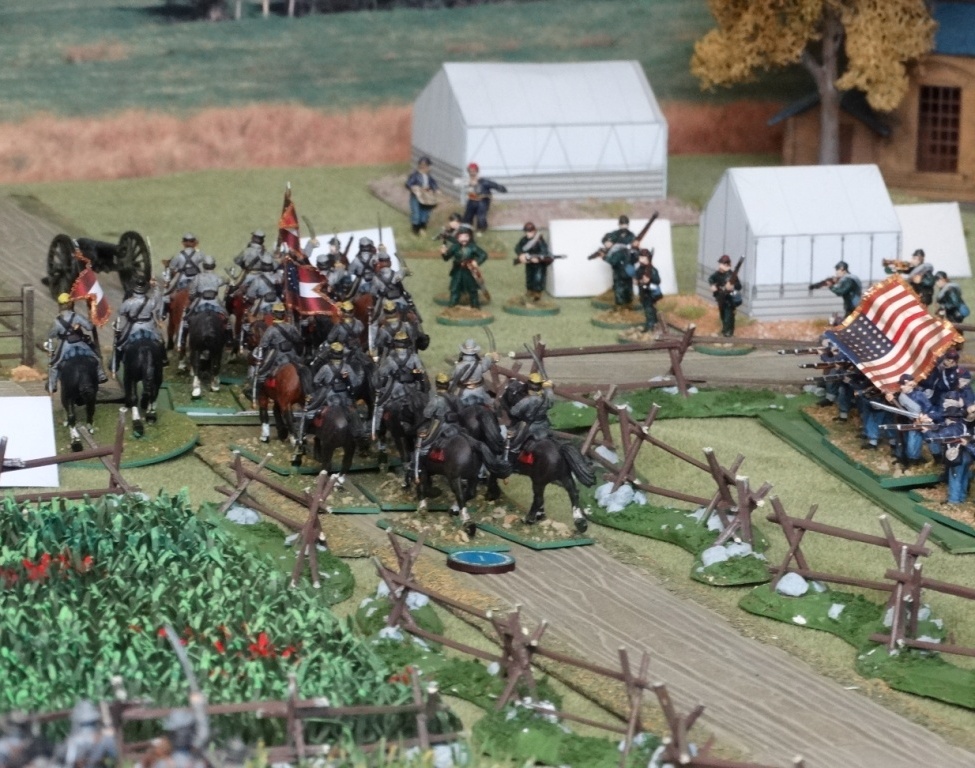
So here goes, the Scenario as I mentioned above involved a Union Brigade of 6 regiments of infantry, with two guns and a regiment of cavalry.   The Confederates had 2 Brigades of cavalry made up of 6 regiments (4 and 2) and 2 regiments of infantry.  The Union troops have one regiment on picket duty stretched across their frontage in 3 units of 6 figures.  The rest of the troops are in the tents with markers to indicate which regiments are where (i.e one row of 3 or 4 tents would house one regiment).  The gunners had separate tents as did the cavalry. 


The aim was for the Confederates to inflict as much damage as possible and get out.  Effectively if the Confederates could hit a tent before the troops inside were mobilised then they were out of the game.  I had originally envisaged rolling command dice for each tent, but this would have taken too long, okay for a solo but a bit boring otherwise with some 21 tents to be diced for.  Instead, I decided on a Command roll for each regiment.  The Union forces couldn’t be mobilised until the picket had opened fire and then any troops that did respond to the Command Roll would be disordered for the first round.

The attack was planned for a 4am and the game was to last for 8 moves, at the end of which the Confederate forces had to be out of range of Union musketry.


We decided that since it was early morning, we would subject the Confederates first move to Blunder Tests with the double retreat changing to obey orders.  I also made markers showing the 3 Confederate Brigade commanders allowing Bob to move them without me knowing which Brigade was where and only disclosing them when they were visible.

Bob decided that the main cavalry brigade commanded by Gen Fitzhugh Lee and consisting of the 1st, 2nd, 3rd and 4th Virginian regiments would attack as individual regiments, rather than as a Brigade.  They all responded to their Command Rolls and the Blunder Tests didn’t affect them and moved forward in the centre and the left flank.


His other smaller Cavalry Brigade consisting of the 5th and 6th North Carolina Cavalry surged forward up the road on the right flank a maximum 3 moves putting them almost in the heart of the Union encampment.


 This ‘heroic dash’ allowed me to try to activate the union forces whilst at the same time gave the pickets a target.  All the Union forces on the my left flank responded to orders as did the 84th New York (Chasseurs) in the centre and the 1st New York Battery on the right flank.  The Union Divisional Commander also woke but stayed in the house to avoid being hit or captured by Bob’s troops.  The New Hampshire Battery on the left and the Brigade commander and the 5th US cavalry slept on!


The pickets firing as tiny units actually proved worthwhile with a d6 disordering the leading 5th NC cavalry and throwing the advance into chaos.

Things weren’t going well for the Confederates on Bob’s left flank with the fields and fences proving to be obstacles slowing the advance of the cavalry.  The infantry simply wouldn’t move and the attack became disjointed. 

Only the 2nd Virginia managed to break the mould and charged on to attack the 84th New York in the flank whilst they were still disorganised.


The 84th were driven back and the 2nd Virginia Cavalry followed up forcing them to Retire a second time.  The 2nd suffered casualties and were disorganised.  The lack of Confederate supporting units forced them to Retire.


On my Union turn the Cavalry and the New Hampshire artillery crew finally emerged from their tents.  

The New York Battery opened fire on the 1st Virginia cavalry and they failed their Break Test and fled.

The Union troops on my right were now organised and opened fire on the disorganised North Carolina Cavalry one of the Freshly raised Union regiments got a Panic Result on their firing and proved to be ineffective.  However the US sharpshooters inflicted damage forcing the NC cavalry brigade to retire.  They returned fire with their pistols and carbines


With Bob’s infantry still failing to come forward he dismounted his two remaining Virginian cavalry regiments to form a skirmish line to cover the retreat of the remaining Confederate forces.


My union cavalry opened fire on the retreating Virginian Cavalry to help them continue their retreat.


The 1st New York fired again on one of the dismounted cavalry units forcing it back.


At the same time my Sharpshooters advanced on the retiring North Carolina cavalry and the other dismounted cavalry regiment.


The Confederate Infantry formed a defensive line 


Whilst the 5th Cavalry mounted to pursue the retiring Confederate cavalry

 However Bob was now pulling back his forces with some good command rolls and out of reach of my forces


The game finished on Move 8.  We had both thought things were going to go very differently.  Bob’s plan was to advance as quickly as possible, ignoring the front of the Union Camp and hitting the rearmost forces and Union Command before they could get organised.  Then move back through the Union lines.  The failure of the infantry to advance and the slow movement of the cavalry wrecked the plan and my Infantry came to life more quickly than we both thought.

The rules worked well except as usual the disorganisation following a throw of a d6 and the variable movement made it more difficult for Bob, in part because of the various fields and fence which has to be crossed.  

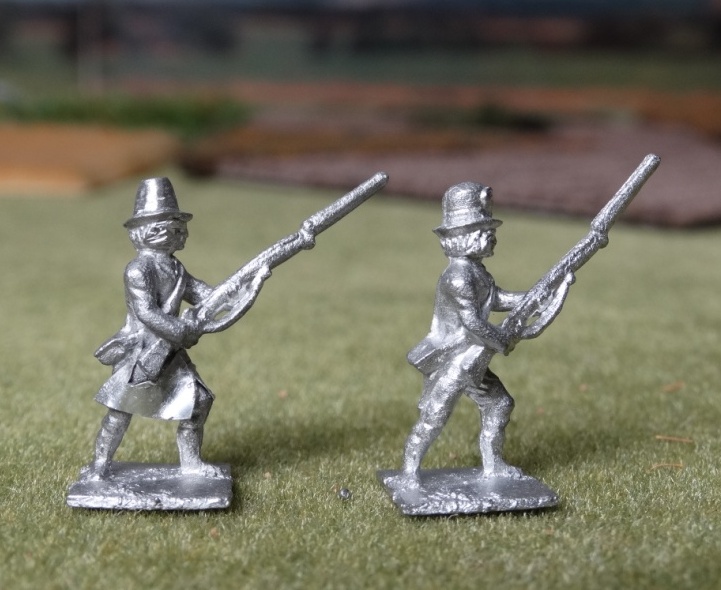
The figures were with one exception exclusively from Perrys Miniatures, all the fences were all made by Jack Alexander and the tents were mostly Whitewash City pdfs (paper) with some Rendra and a couple of old Bellona Bell tents.

Wednesday 7 November 2018

S Range Conversions - Civilians or Frie Corps?

Back from the US for a few weeks now and the painting and converting bug has left me.  

However, I had on the table some conversions I had started before I went and I slowly - very slowly - set about painting and finishing them.  The idea stemmed from an article I read  I about some of the Frei Corps in the Schelswig Holstein War and they seem very much like civilians who turned up with the minimum of uniform - maybe an arm band and a flag.  This set me wondering if I could make some civilians who could fit into any of my 1866-1870 periods.

The French Revolutionary War Citizen (FR5) with musket is an excellent starting point.  


The figure is available from John Cunningham so no struggling trying to make moulds etc.  He looks very revolutionary with his cockade, but a quick file can remove this.  The coat is a bit early 19th century but some of this can be disguised with paint.   The other thing you can do is to play with the shape of the hat with a simple file a big rough file to reduce the width and then a finer one to finish the detail.  A plume can be added made from green stuff to give if a bit of style.


I tried to go a bit further and make a fuller coat.  I use bits of drinks can cut with scissors and glued in place and then filed smooth.  This was a bit of a pain but worth the trial for a bit of variety but he is going to be very much a one off.  

Having seen pictures of 'cadets' and university students wearing a peaked cap of sorts I did a head swap with a Saxon infantryman head I had left over from a another conversion to give still more variety. The Spanish infantryman with up turned brim also readily available can also be used 'as is' or you can swap as shown below.  The absence of back packs makes them more like civilians or Frei Corps troops/civilians rushed into action.  


When I looked again at the picture on the cover of a recent issue of the Foreign Correspondent a couple of the figures looked as if they were wearing hats like those in the ACW.  I have a lot of Perry's figures and you always get more hats than you can use so I filed and roughly cut away the hat from one of the Revolutionary War figures until it was flat and super glued on a plastic hat it worked a treat.  I added a plume for the hell of it.  

This is a lot less daunting and simpler than swapping heads and gives instant variety to a single pose.

Whilst I was at it I also trimmed the coat tails on a couple of the Revolutionary War figure for variety.

French Revolutionary with Perry Hat and plume
 Some more variants
French Revolutionary with hat cut back to just leave hair
French Revolutionary with long tail coat cut back and Spanish head swap and plume
In the interest of equality I wanted some women to fight alongside the men.  So I took the French Citizeness with musket (FR1) and swapped her head with the Cantinere (OF8) figure.  The outcome was a figure which looked like she belonged with the Suffragettes but she can fight alongside the men. 


I also modified FR2 the Citizeness with pitchfork to give her a pike.  I think I will make her the standard bearer.  My attempt at giving her a headscarf was less successful!


Anyway my unit of Frei Corps/Militia/townsfolk - only 12 strong - will no doubt defend their homeland with vigour.


Tuesday 11 September 2018

French and Russians - Napoleonic Black Powder Game

I am off to the States on Friday so this is my last post until I return in October!

Went over to Bob’s to play our first game in what seemed like an age, a bereavement in my family followed by holidays and hot weather turning his garage into a stage set for Bridge on the River Kwai (kept expecting Alec Guinness to emerge at any moment) meant that the months had rolled by.

Bob had been busy on his French and Russian Napoleonic figures and so we decided that they deserved an outing.  As Bob pointed out if he put them all out they would stand shoulder to shoulder from one edge of the table to the other so we decided to each have reserves that would come onto the table in move 3.

Bob commanded the French and I had the Russians.  Overall Bob’s Brigade commanders were much better than mine with two having command scores of 10 and another with a score of 9.  Oddly in fact this proved to be a disadvantage as you will see and left us puzzling about whether we had got the rules right.

The French forces including reserves:
3 brigades each of3 infantry regiments (3 x Old Guard)
4 regiments of Cuirassiers
2 units of Carabineers
4 regiments of Chasseurs a cheval
5 regiments of Line lancers
2 x horse artillery
2 x foot artillery


3 regiments of Line lancers on the left flank with a horse battery; an infantry brigade in the middle supported by a heavy cavalry heavy cavalry with Chasseurs a cheval on his right
The Russians including reserves:
3 brigades of 3 infantry regiments
Peasants
5 x Uhlans (2 Guard)
5 x Dragoons (2x Guard)
3 x Line lancers
2 x horse artillery
2 x foot artillery
1 x unit of Cossacks

The Russians had less cavalry to start with but had two brigades of infantry, a regiment of Cuirassiers and a brigade of lancers, 2 field batteries and 2 horse artillery batteries.  They were given the additional moral support of Monks and a superb Russian Church built by Jack which inspired the local peasants to heroic levels (and frankly silly success).


The French had the initiative and immediately Bob threw forward his lancers on the infantry brigade to the front hoping to catch them out of formation.  Unfortunately, the charge fell short but we felt that the Russians would try to make square given the proximity of the lancers.  Each regiment in the brigade tried to form square, one managed it one didn’t and the other managed a blunder test and fled the table! Not a good start.


The centre units all advanced slowly but on the right the Chasseurs pushed forward, but not enough to make contact with their Russian opposite numbers.


The unfortunate lancers not only found them short of my infantry but in close range of my artillery who together which a ragged volley from the disordered infantry forced them to halt and become disordered.


On my right I charged the French Chasseurs with my lancers pushing them back and destroying them in the follow up.


In the centre my Cuirassiers advanced forcing the infantry into squares for safety.


The next move saw Bob bring on his reserves, more heavy cavalry; the Guards; another brigade of infantry; line lancers together with a field artillery battery.


And here’s where the problems started with the French high command levels, only needing a ten.  Bob started to get three moves on an almost consistent basis.  We were playing 50% movement rates which left units just short of contact with the Russians but at close range for artillery and infantry fire but unable to fire. 
 
On the left the line lancers were stuck in front of the Russian lines with a hold command.  It seemed a bit of a nonsense for the whole brigade to be standing still so we agreed that they the front regiment who had suffered casualties move but the other 2 regiments could.  This didn’t help much as one failed the command and the other got a blunder test moving it to the right one move.  So instead of attacking the peasants the road at right angles to them.  The Peasants were deemed to be freshly raised and had to test.  Inspired by the Church and Monks and threw a six, giving them an extra hit dice.  Two hits (one a six) on the lancers and neither saved and they were disordered, to make matter worse the gun was blocked by the cavalry!  Those priests were working over time!


Lovely resin Monk from V&V Miniatures
In the centre my Cuirassiers clashed with the French heavy cavalry beat them soundly but lost the melee because of the French supports and were forced to retire.


The French infantry formed their lines and with a command factor of 10 swept across the table with three moves charging the Peasants and my Russian Guard infantry.
The Peasants again worked wonders scoring 2 sixes on the charging French infantry, neither of which was saved the Guard also scored but they were saved. The French hit home.  At this point we weren’t too sure what the Peasants should be given by way of hand to hand dice.  We settled on 4 dice given the superhuman guidance they were getting from the Priests and their desire to save the church from the hands of the French.  This resulted in their opponents being thrown back.  We think we over egged the Peasants as this seemed an unlikely result.  Whilst the French unit facing the Guard although losing passed their Break Test with flying colours and hung on in.


In the centre my Cuirassiers again threw themselves forward charging the enemy lancers only again to win the engagement and lose the melee and flee following a Break Test.

An attempt by the French to rally their lancers on the right proved successful but before they could take advantage more Russian artillery fire and a volley from the infantry who had now managed to form a square was enough to see them destroyed together with the gallant general who had risked all to get them reorganised.


Good through this seemed at the time it merely cleared the way for a brigade of French infantry to advance on the Russians. 

On the French left the Guard Brigade which also had a line infantry regiment with them, having a command of 10 got three moves which left them inches short of two brigades of Russian lancers.  We both thought this has highly improbable and frankly daft.  We work on 3 moves and you can’t fire so they would have just be stood there waiting for my cavalry to hit them next go.  We decided that the 3 moves had to be taken but agreed 2 forwards and form a brigade square as part of the third move.  This didn’t help them particularly as it brought them in close range of a battery of field artillery and another of horse artillery.
Their supporting Cuirassiers decided not to move at all which didn’t help!


During my turn the Russian Guns opened up on the Guard brigade, and although they only managed one hit, it was enough to require a Break Test.  The Guards failed this getting a ‘4’ after deductions causing the entire Brigade square to flee the field.


Again the high command score sent infantry forward at 3 moves blocking their own guns leaving them just short of my Russian infantry on the right and their supporting field artillery.  The result saw them taking a hit and fall back as part of their Break Test.


The French infantry and disordered cavalry across the table prevented the French from taking advantage of their remaining cavalry superiority.


At this point we called a halt to a game which we had played over two separate days a week apart.  Whilst the Russians had seen off the attack, the French were still serious contenders if we wanted to allow a bit of reorganisation.  The Russians had infantry superiority but the numbers of French cavalry presented a threat to manoeuvre anywhere on the table and there wasn’t enough Russian cavalry to see off all the threats.  The problem for the French was the high command levels prevented any real manoeuvring unless they were moving from flank to flank.  Otherwise, they were going straight forwards and falling short bringing them under both musket and artillery fire and unable to respond.  The Russians lower command levels often only resulting in 1 or no moves oddly worked to their advantage.

All the Russians were from Lancashire Games except the Cossacks from Irregular Miniatures; the Peasants from Perry’s; most of the Priest from Old Gory and a beautiful resin figure of priest from V&V Miniatures.

The majority of the French cavalry and guns are from Lancashire Games with a unit of plastic Carabineers and Cuirassiers from Perry’s.  The Infantry is a mixture of Warlord Games - Outpost Miniatures (Old Guard in Bearskins by Perry) Generals on both sides from a variety of sources the Church was scratch built by Jack Alexander